November 8, 2026
Build Your Own Home Mini and Make It Speak Turkish
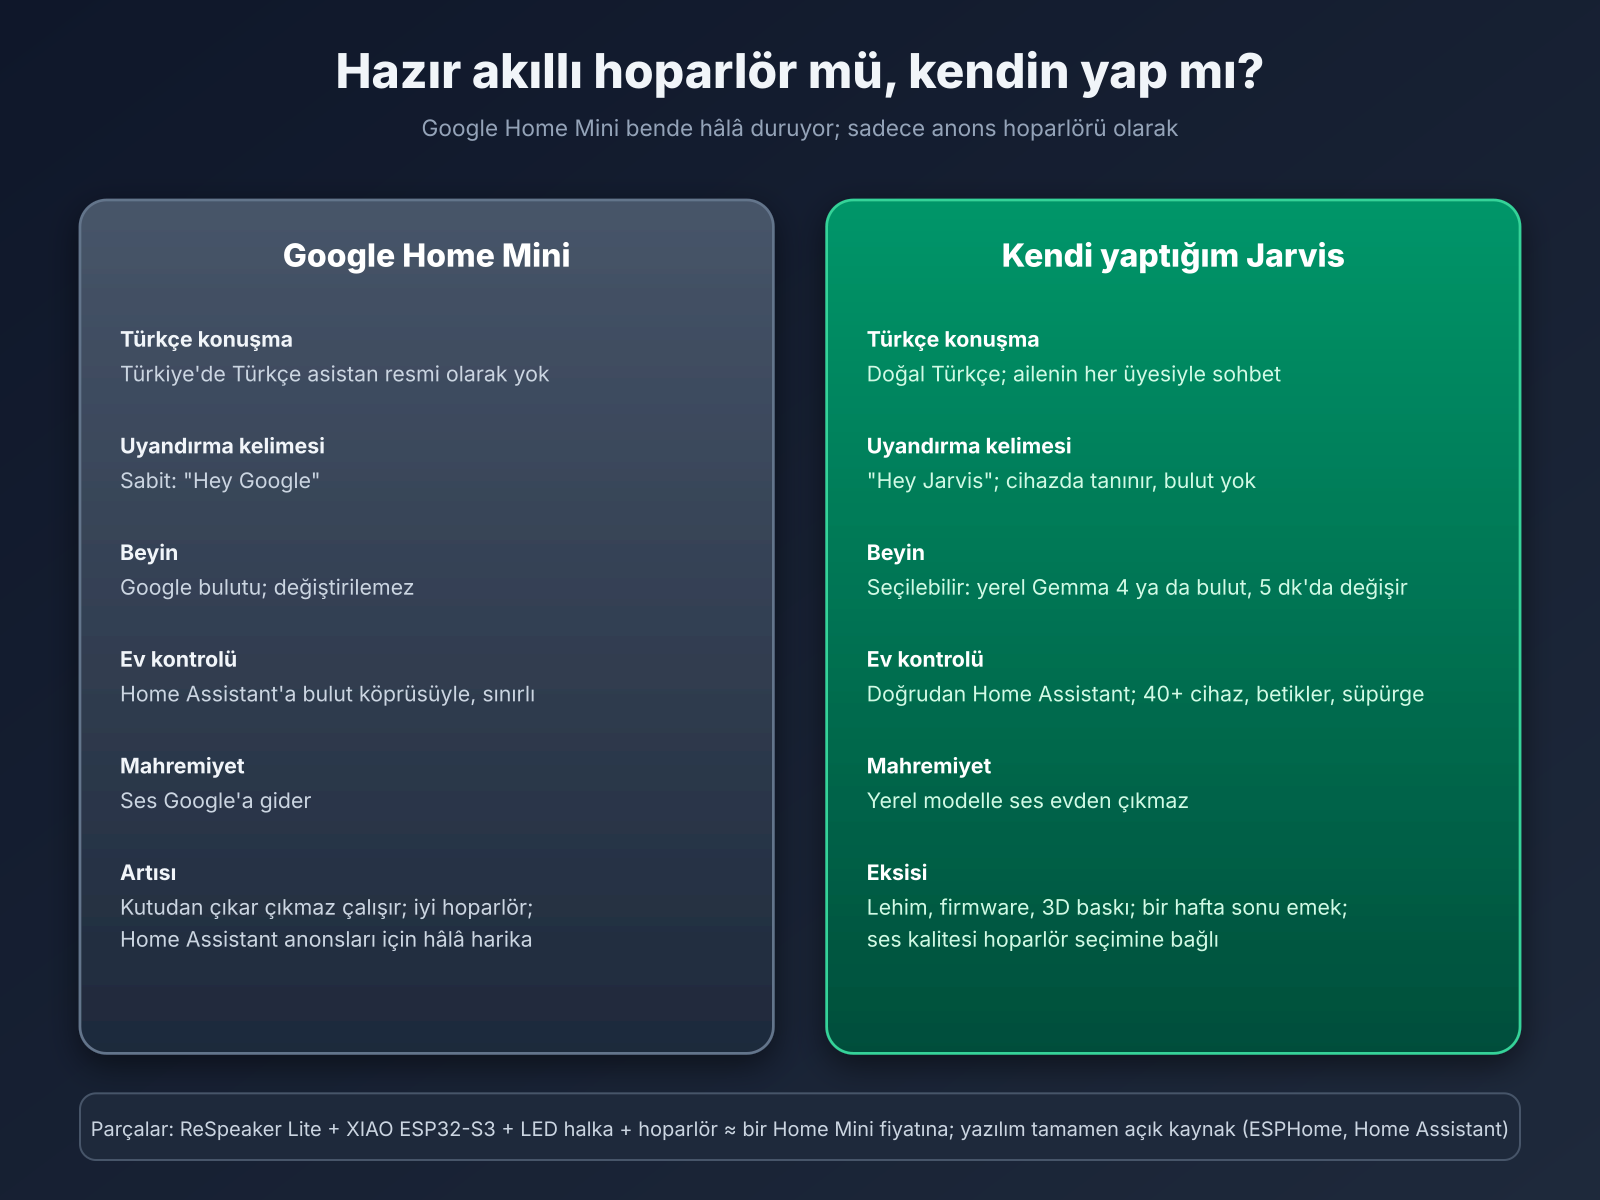
Google Home Mini does not speak Turkish, so I built an assistant that wakes to "Hey Jarvis", speaks Turkish and runs the house through Home Assistant. Parts list, soldering, the ESPHome config, a 3D-printed enclosure (STLs included) and three weeks of fine-tuning, all in one place.
There has been a Google Home Mini in my house for years. As an announcement speaker it is flawless: it says "dishes are ready" when the dishwasher finishes and greets the kids when they get home from school. But asking it anything in Turkish is impossible; a Turkish assistant never came to Turkey, you cannot give it any name other than "Hey Google", and you cannot replace its brain. When the kids asked "why doesn't it talk to us", I decided: we would build our own assistant. Its name would be Jarvis, it would speak Turkish, and it would run the house.
Three weeks later, Jarvis sits in a 3D-printed box in the living room. Say "Hey Jarvis, how cold is it outside?" and it answers "It's 8.6 degrees outside, partly cloudy"; say "turn on the back lamp" and it does, replying "Back light is on"; ask it a riddle like the kids do and it answers with a riddle. This post is everything you need to build the same: parts list, soldering, firmware, the ESPHome config, the STL files for the enclosure and the lessons I learned.
Parts list
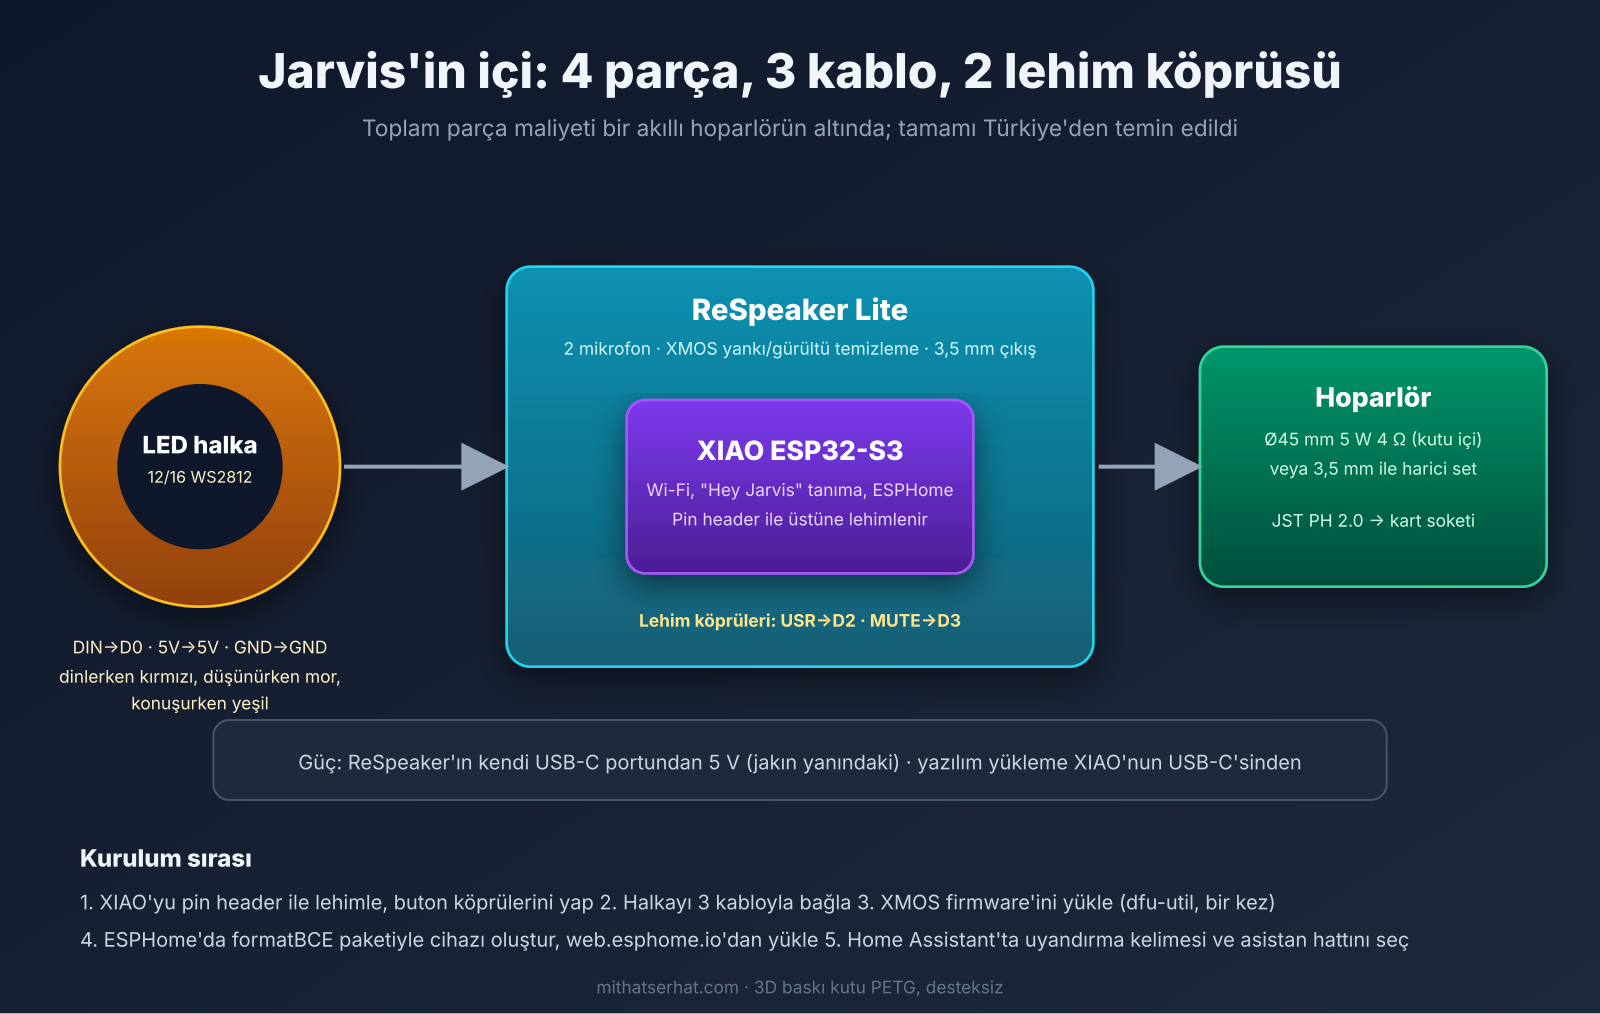
Everything came from Turkey (Robot Sepeti); the electronics add up to less than the price of a smart speaker.
| Part | What it does | Note |
|---|---|---|
| Seeed ReSpeaker Lite (USB 2-Mic) | Two microphones + XMOS XU316 audio processor: echo and noise cancellation, speaker output | The board has a XIAO socket, a 3.5 mm jack and a JST PH 2.0 speaker socket |
| Seeed XIAO ESP32-S3 | Wi-Fi + on-device "Hey Jarvis" wake word detection | Comes with an external antenna (it stays inside the box) |
| WS2812B LED ring, 12 LEDs (Ø50 mm) | Red while listening, purple while thinking, green while speaking | A 16-LED (Ø67) ring works too; the box is sized for the 12 |
| Speaker Ø45 mm, 4 Ω 5 W | Sound inside the box | Alternative: an external set via the 3.5 mm jack |
| USB-C adapter 5 V 2–3 A | Power, through the ReSpeaker's own USB-C | A phone charger is enough |
| 2×7 pin header (for the XIAO), 3 wires, (optional) 330 Ω resistor, 1000 µF capacitor | Soldering | |
| 3D-printed enclosure, 5 parts, PETG | Below; STLs at the end of the post | ~60 g of filament |
Software: ESPHome (Home Assistant add-on) + formatBCE's ReSpeaker Lite package. Far less hassle than Seeed's official route, and you get every feature of Home Assistant's own Voice PE device.
Assembly in photos
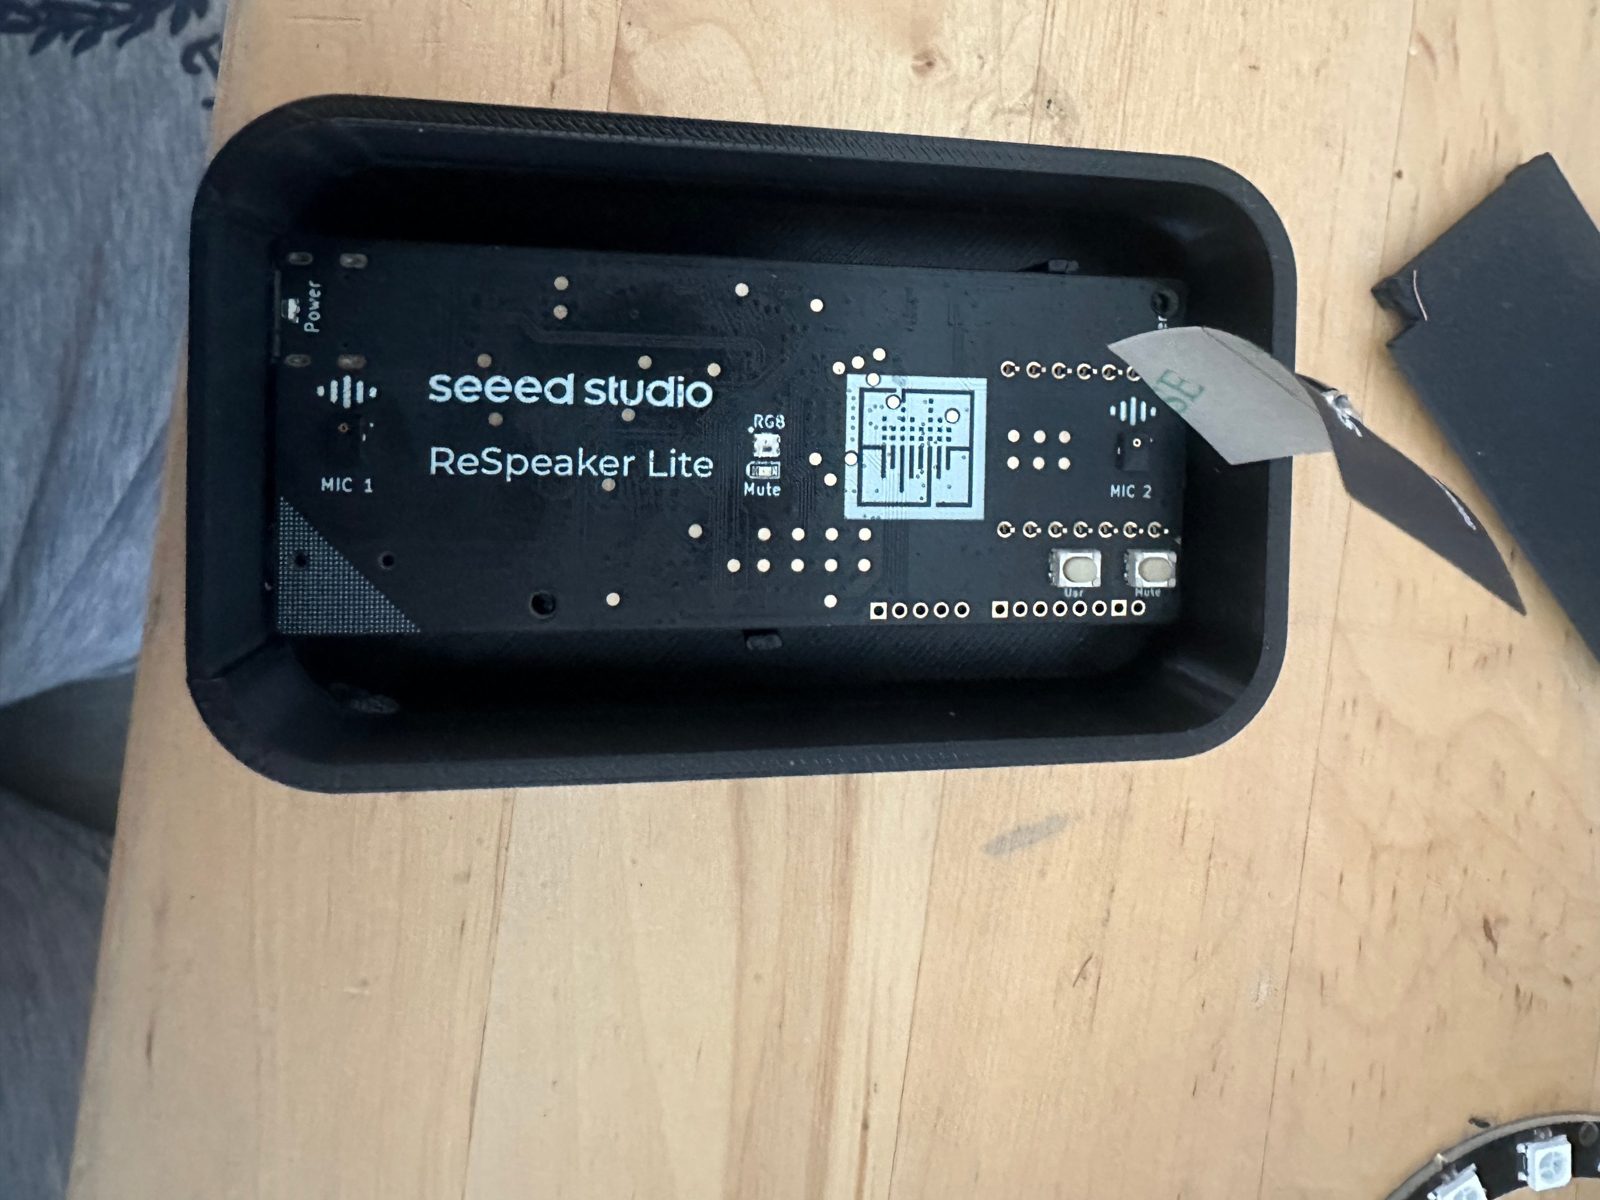
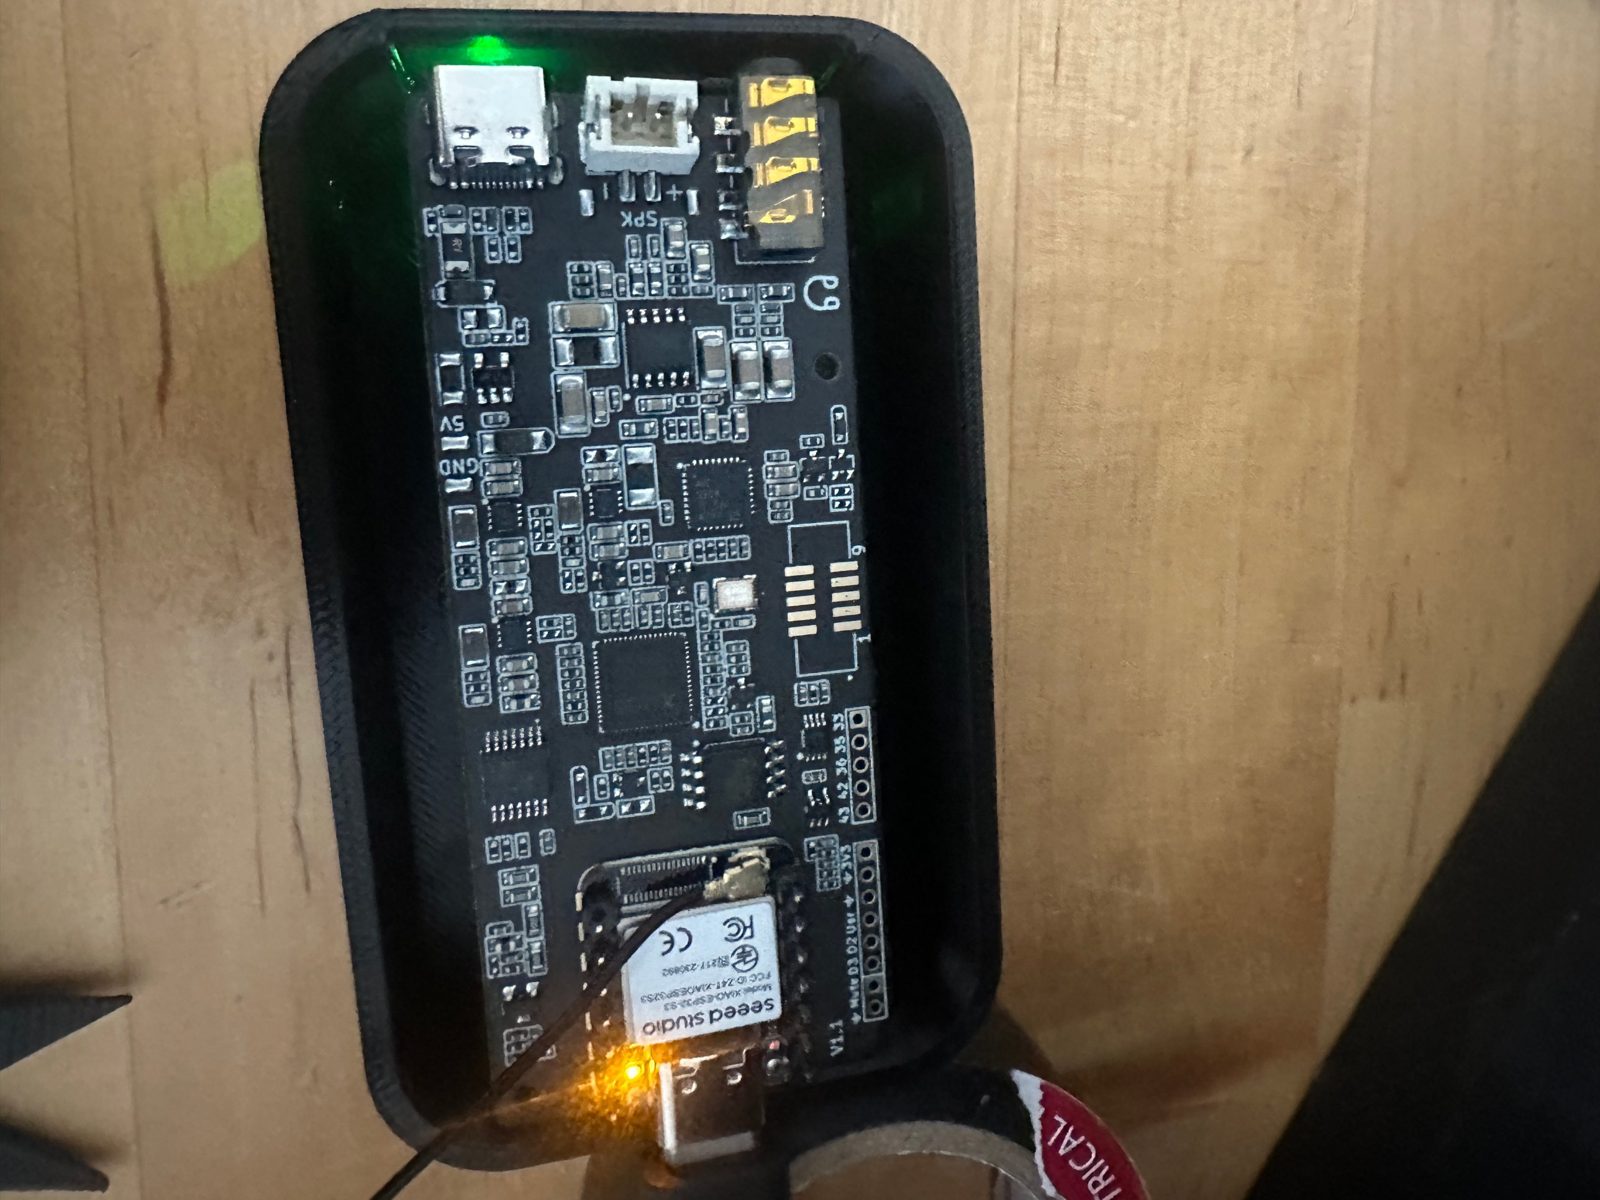
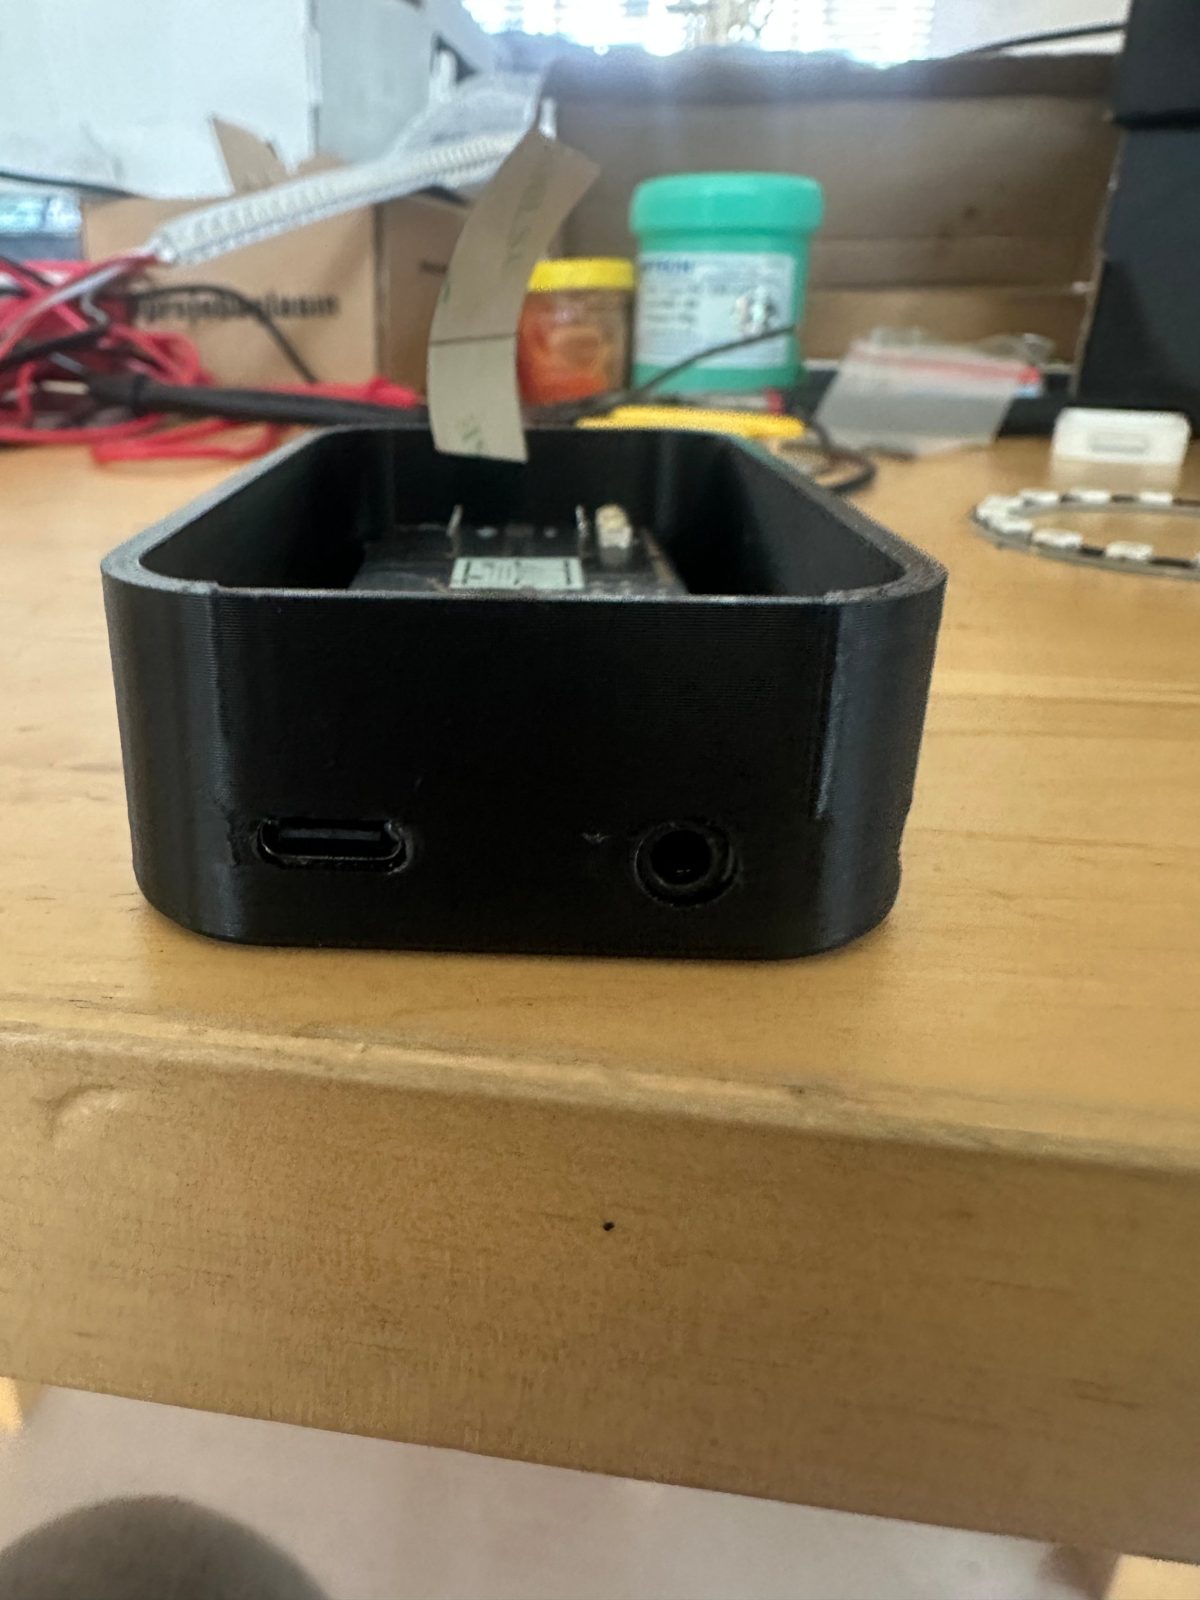
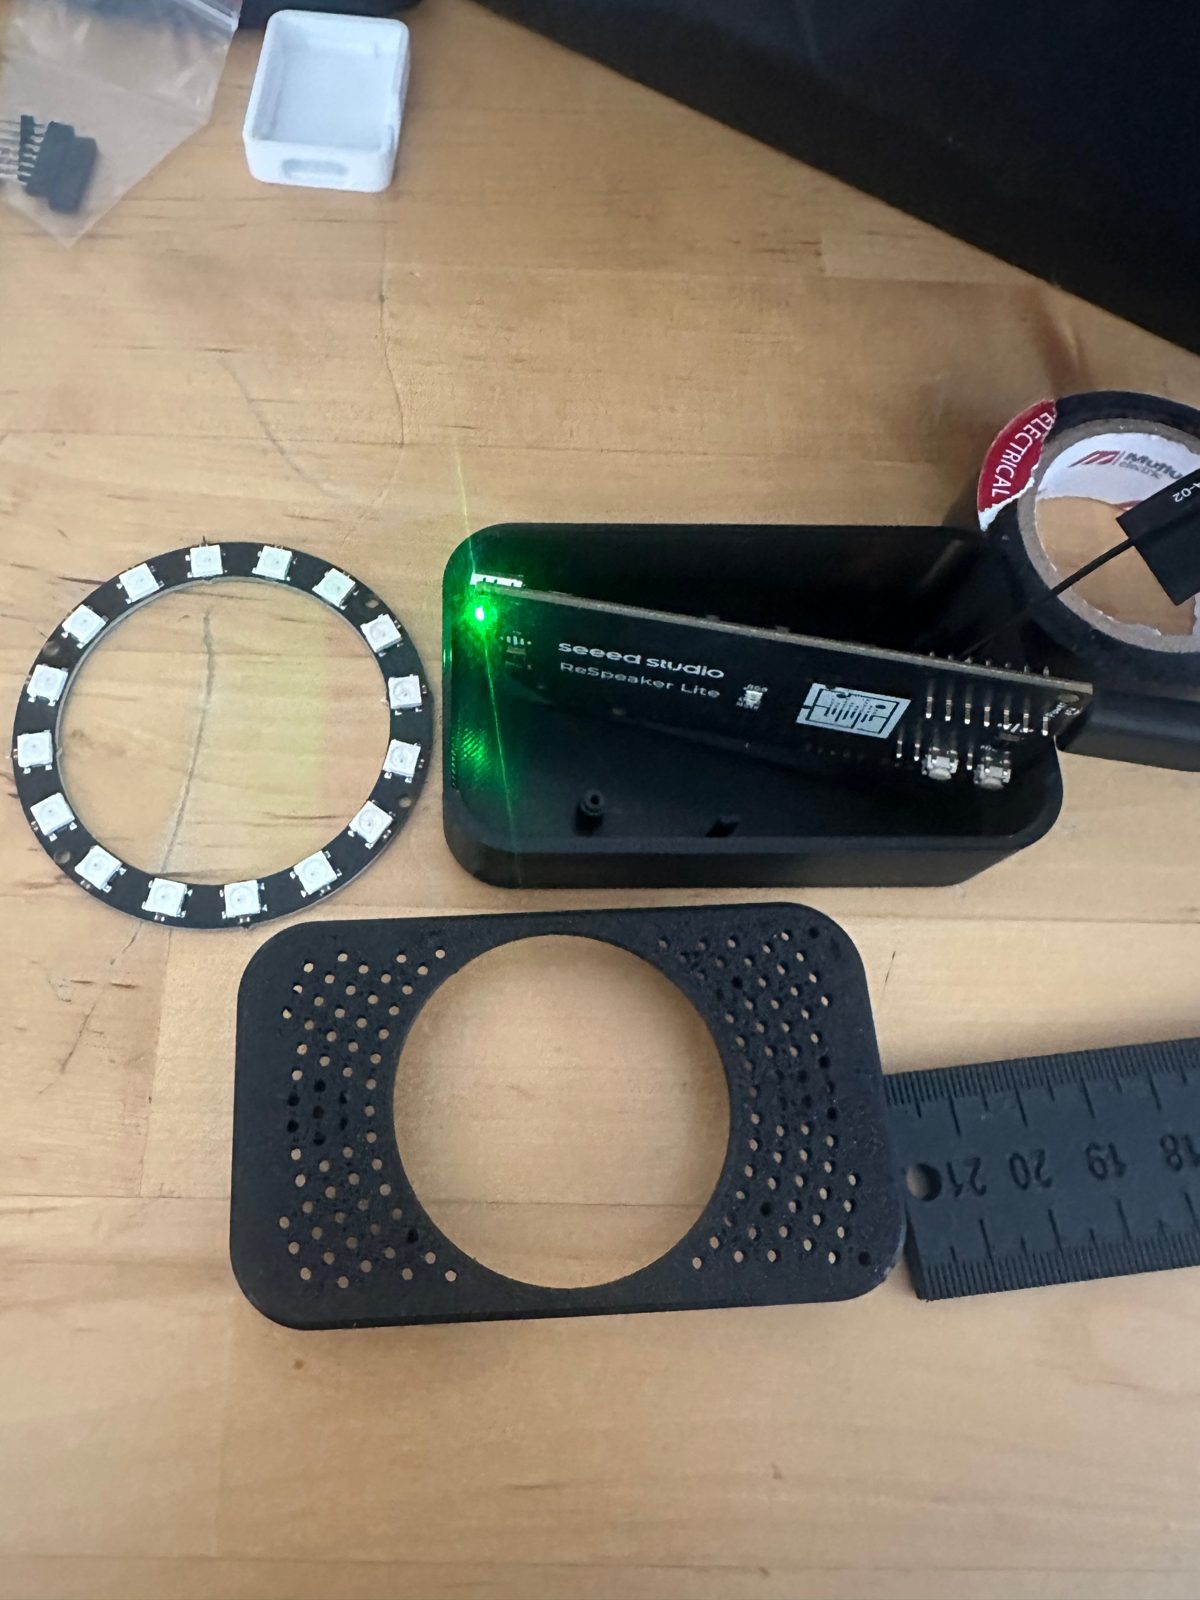
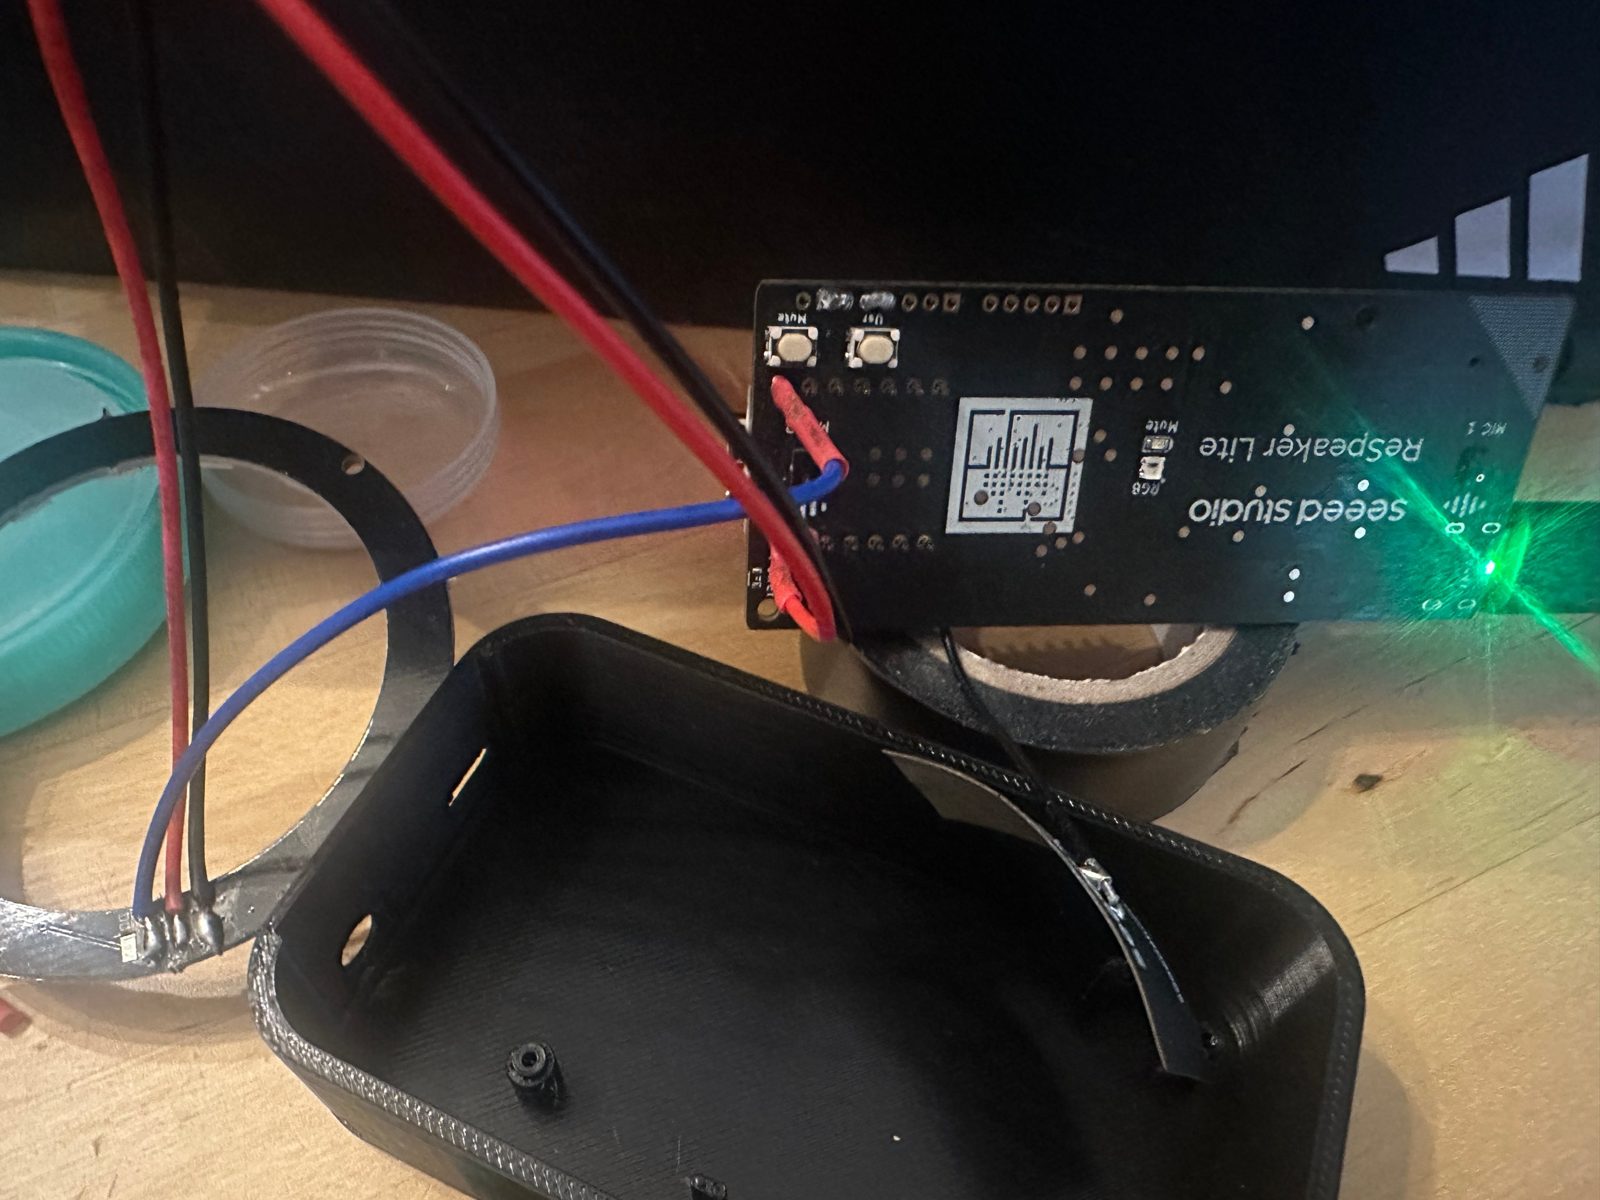
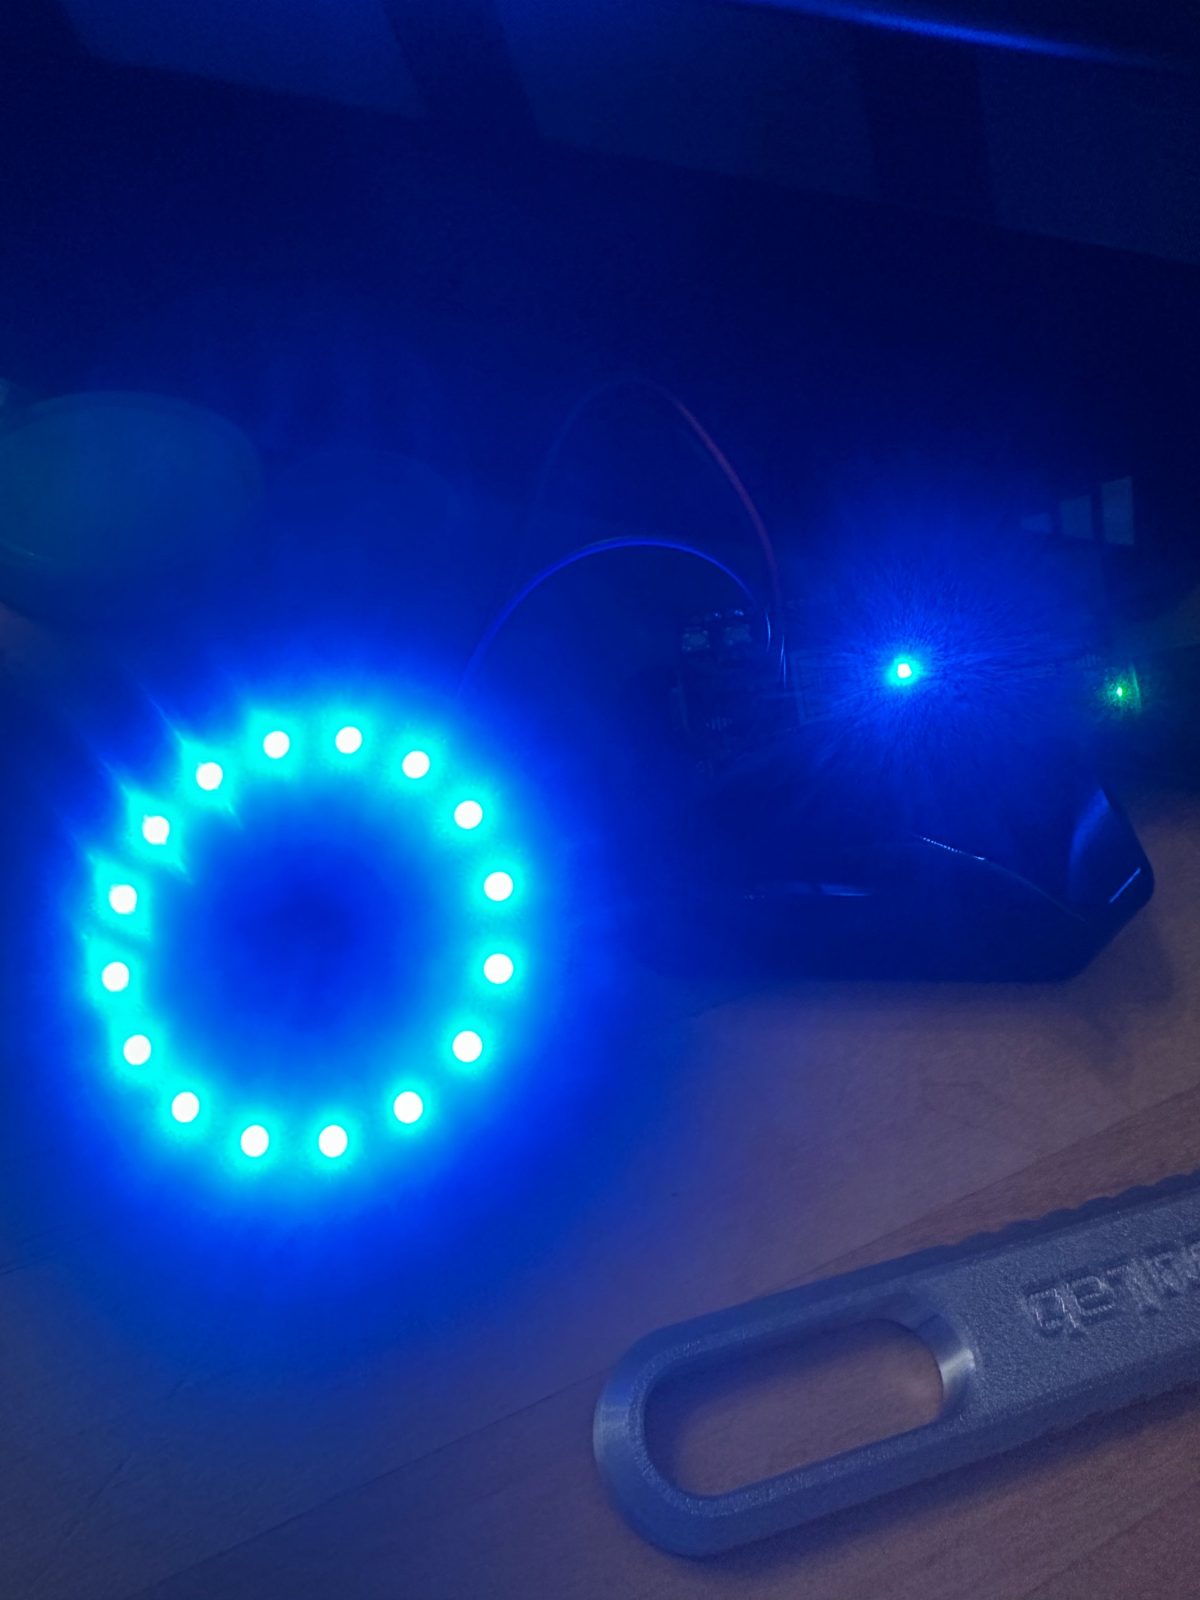
Soldering: three wires, two bridges
1. XIAO onto the ReSpeaker. The XIAO's position and the direction of its USB-C end are printed on the board; follow that outline and solder it with the pin header (not directly to the surface; it makes removal easy if you ever need to). For the first week I used the header without solder, just "plugged in"; the audio came through choppy and for two weeks I suspected Wi-Fi. The problem was a bad contact. Solder it.
2. Button bridges. The two buttons on the ReSpeaker connect to the XIAO through solder bridges: USR → D2, MUTE → D3. Without them the buttons and software mic muting do not work.
3. LED ring. There are four pads on the back of the ring: DI (DIN), DO, 5V, GND. DO stays empty.
| Ring | → | XIAO |
|---|---|---|
| DIN | → | D0 (GPIO1) |
| 5V | → | 5V |
| GND | → | GND |
D0 already drives the board's own RGB LED; the ring is wired in parallel to it and the two light up together. There is no other free pin, so this is a deliberate choice. A 330 Ω resistor in series on the data line protects the signal; if the ring flickers, put a 1N4001 diode on the 5V line (it drops the voltage to 4.3 V so the 3.3 V signal is read more reliably). If the ring's DIN pad lifts while soldering (mine did), you can solder the wire directly to the DIN leg of the first LED.
4. Speaker. A 2-pin JST PH 2.0 cable into the board's SPK socket. If you are using an external set, the 3.5 mm jack.
The XMOS firmware (once)
The ReSpeaker ships in USB microphone mode; for Home Assistant you need to flash the I2S 48 kHz firmware. Plug the cable into the ReSpeaker's own USB-C (the one next to the jack), not the XIAO's:
brew install dfu-util          # Linux: apt install dfu-util
dfu-util -l                    # kartı gör
dfu-util -R -e -a 1 -D respeaker_lite_i2s_dfu_firmware_48k_v1.1.0.bin
Download the file from the same tag as the release in formatBCE's GitHub repository (e.g. 2026.10.3). Do not unplug during flashing; when it finishes, unplug and plug back in.
ESPHome: the full config
Home Assistant → ESPHome Builder → new device → ESP32-S3 → skip the wizard and paste this into the editor. The package does all the audio work; this file only replaces the LED ring and Jarvis's colours:
substitutions:
  respeaker_lite_ref: 2026.10.3

packages:
  respeaker-satellite: github://formatBCE/Respeaker-Lite-ESPHome-integration/config/common/respeaker-satellite-base.yaml@${respeaker_lite_ref}

esphome:
  name: jarvis-salon
  friendly_name: Jarvis Salon

wifi:
  power_save_mode: none        # (1) ses kesilmesinin ilk çözümü
  output_power: 11dB           # (2) modemin dibindeyse verici gücünü düşür

improv_serial:                 # Wi-Fi bilgisi ilk yüklemede web.esphome.io'dan girilir

ota:
  - platform: esphome
    id: ota_esphome

speaker:
  - id: !extend i2s_audio_speaker
    buffer_duration: 600ms     # (3) paket varsayılanı 100 ms; takılmanın asıl çözümü

button:
  - platform: restart
    name: Yeniden Başlat

sensor:
  - platform: wifi_signal
    name: Wi-Fi sinyal
    update_interval: 60s

light:
  - id: !remove led_internal
  - id: !remove led_respeaker_onboard

  - platform: esp32_rmt_led_strip
    id: led_internal
    internal: true
    channel_colors: GRB
    pin: GPIO1                 # XIAO D0
    num_leds: 12               # 16'lı halkada 16
    rmt_symbols: 192
    bit0_high: 300ns
    bit0_low: 975ns
    bit1_high: 650ns
    bit1_low: 650ns
    reset_low: 300us
    reset_high: 0us
    max_refresh_rate: 15ms
    default_transition_length: 0s
    color_correct: [55%, 55%, 55%]   # güç sınırı: 12 LED beyazda ~0,4 A
    effects:
      - addressable_lambda:
          name: "Slow Pulse"
          update_interval: 30ms
          lambda: |-
            static float f = 0.0; static bool up = true;
            auto v = id(led_internal)->current_values;
            Color c(v.get_red() * 255, v.get_green() * 255, v.get_blue() * 255);
            it.all() = Color(c.red * f, c.green * f, c.blue * f);
            f += up ? 0.05 : -0.05;
            if (f > 1.0) { f = 1.0; up = false; } else if (f < 0.0) { f = 0.0; up = true; }
      - addressable_lambda:
          name: "Fast Pulse"
          update_interval: 10ms
          lambda: |-
            static float f = 0.0; static bool up = true;
            auto v = id(led_internal)->current_values;
            Color c(v.get_red() * 255, v.get_green() * 255, v.get_blue() * 255);
            it.all() = Color(c.red * f, c.green * f, c.blue * f);
            f += up ? 0.05 : -0.05;
            if (f > 1.0) { f = 1.0; up = false; } else if (f < 0.0) { f = 0.0; up = true; }
      - addressable_lambda:
          name: "Spin"            # düşünürken halkada dönen kuyruklu ışık
          update_interval: 45ms
          lambda: |-
            static int head = 0;
            auto v = id(led_internal)->current_values;
            Color c(v.get_red() * 255, v.get_green() * 255, v.get_blue() * 255);
            const int n = it.size();
            for (int i = 0; i < n; i++) {
              int d = (head - i + n) % n;
              float f = d == 0 ? 1.0f : d == 1 ? 0.5f : d == 2 ? 0.22f : d == 3 ? 0.08f : 0.0f;
              it[i] = Color(c.red * f, c.green * f, c.blue * f);
            }
            head = (head + 1) % n;

  - platform: partition         # HA'dan açılıp kapatılabilen "gece lambası" ışığı
    id: led_respeaker_onboard
    name: LED halka
    entity_category: config
    restore_mode: RESTORE_DEFAULT_OFF   # boşta sönük; sadece "Hey Jarvis" sonrası yanar
    segments:
      - id: led_internal
        from: 0
        to: 11

script:
  - id: !remove control_leds_voice_assistant_waiting_for_command_phase
  - id: !remove control_leds_voice_assistant_listening_for_command_phase
  - id: !remove control_leds_voice_assistant_thinking_phase
  - id: !remove control_leds_voice_assistant_replying_phase

  - id: control_leds_voice_assistant_waiting_for_command_phase   # "Hey Jarvis" dedin, bekliyor
    then:
      - light.turn_on: {id: led_internal, brightness: 35%, red: 100%, green: 0%, blue: 0%, effect: "Slow Pulse"}
  - id: control_leds_voice_assistant_listening_for_command_phase # dinliyor
    then:
      - light.turn_on: {id: led_internal, brightness: 35%, red: 100%, green: 0%, blue: 0%, effect: "None"}
  - id: control_leds_voice_assistant_thinking_phase              # düşünüyor
    then:
      - light.turn_on: {id: led_internal, brightness: 35%, red: 70%, green: 0%, blue: 100%, effect: "Spin"}
  - id: control_leds_voice_assistant_replying_phase              # konuşuyor
    then:
      - light.turn_on: {id: led_internal, brightness: 35%, red: 0%, green: 100%, blue: 25%, effect: "Fast Pulse"}
Compiling takes half an hour on a Raspberry Pi; be patient. First flash: Install → Manual download → Factory, then plug the cable into the XIAO's USB-C and in Chrome go to web.esphome.io → Install. Every later update is wireless (OTA). On first boot the XMOS version is verified; do not cut power while the LED blinks white.
The three numbered lines cost me three weeks:
power_save_mode: none— the ESP32 default puts Wi-Fi to sleep and wakes it; the audio stream arrives choppy.output_power: 11dB— Jarvis sits right next to the router (−20 dBm). Too strong a signal causes problems too.buffer_duration: 600ms— the real fix. The package's 100 ms buffer stuttered at the start of every sentence. If you leave out!extendyou get a "platform key" error.
Home Assistant settings
- Device → Wake word: Hey Jarvis (recognised on-device, no cloud). Sensitivity: "Slightly sensitive".
- Finished speaking detection: relaxed. "Aggressive" was cutting off the end of sentences.
- Settings → Voice assistants → new pipeline: STT, brain, TTS. My choices are below. "Prefer handling commands locally" is on: "turn on the back light" runs in 0.3 seconds without reaching the LLM.
- On the device page, select this pipeline as the assistant.
- Put the device in an area in HA; when you switch devices in that area with a local command, it just plays a confirmation sound instead of speaking, which is far less tiring.
- You can drive Jarvis's LED ring from other automations too (
light.jarvis_salon_led_halka): red-and-yellow when a goal is scored, rainbow on birthdays.
Turkish: the hard part
The hardware was done in one evening; getting it to speak Turkish properly took three weeks.
Speech recognition (STT). Free Whisper hallucinates on short Turkish commands (it heard "turn on the decorative light" as "tree"). Whisper large-v3 via Groq is better, and passing device names as a hint text helps too, but the most accurate is Google's cloud STT. If you want fully local, there are Turkish fine-tuned Whisper models; the quality gap is noticeable.
Brain (LLM). Gemma 4 running on a computer at home; Gemini when the computer is off. The details and the full prompt are in the Hybrid AI Home Control System post. Whatever the model, the real work is in the prompt: without rules like "if the device is ambiguous, ask, don't guess", "don't answer the TV", "write numbers as digits", the assistant turns off lights at random.
Text-to-speech (TTS). Edge TTS's Turkish "Emel" voice is natural and free. Fully local Piper has Turkish voices but they are more robotic. A trap: ending the reply with "." froze TTS for 8 seconds; "Ok." fixed it. Emoji and bullet points get read aloud, so they are banned in the prompt.
The English error message. When the brain fails, HA says "Sorry, I had a problem…". With one line in the firmware (on_tts_start: raise a flag if the text starts with "Sorry") I have HA say "Something went wrong, could you try again?" in Turkish instead.
Family. Family members are introduced in the prompt; it explains things patiently and simply to the kids and keeps a conversation going with a short question. The younger one asks for riddles, the older one asks for match scores (which it answers thanks to the internet search tool).
The enclosure: 3D-printed, five parts
I designed the box myself (parametric, Python + Manifold) and it went through five versions: the ring did not fit the first, the jack hole was too tight in the second, the third got rails and a snap-fit lid, the fourth added a speaker compartment underneath, and in the fifth the jack and USB-C openings grew by 20% and the speaker cable hole moved to the socket end of the board.
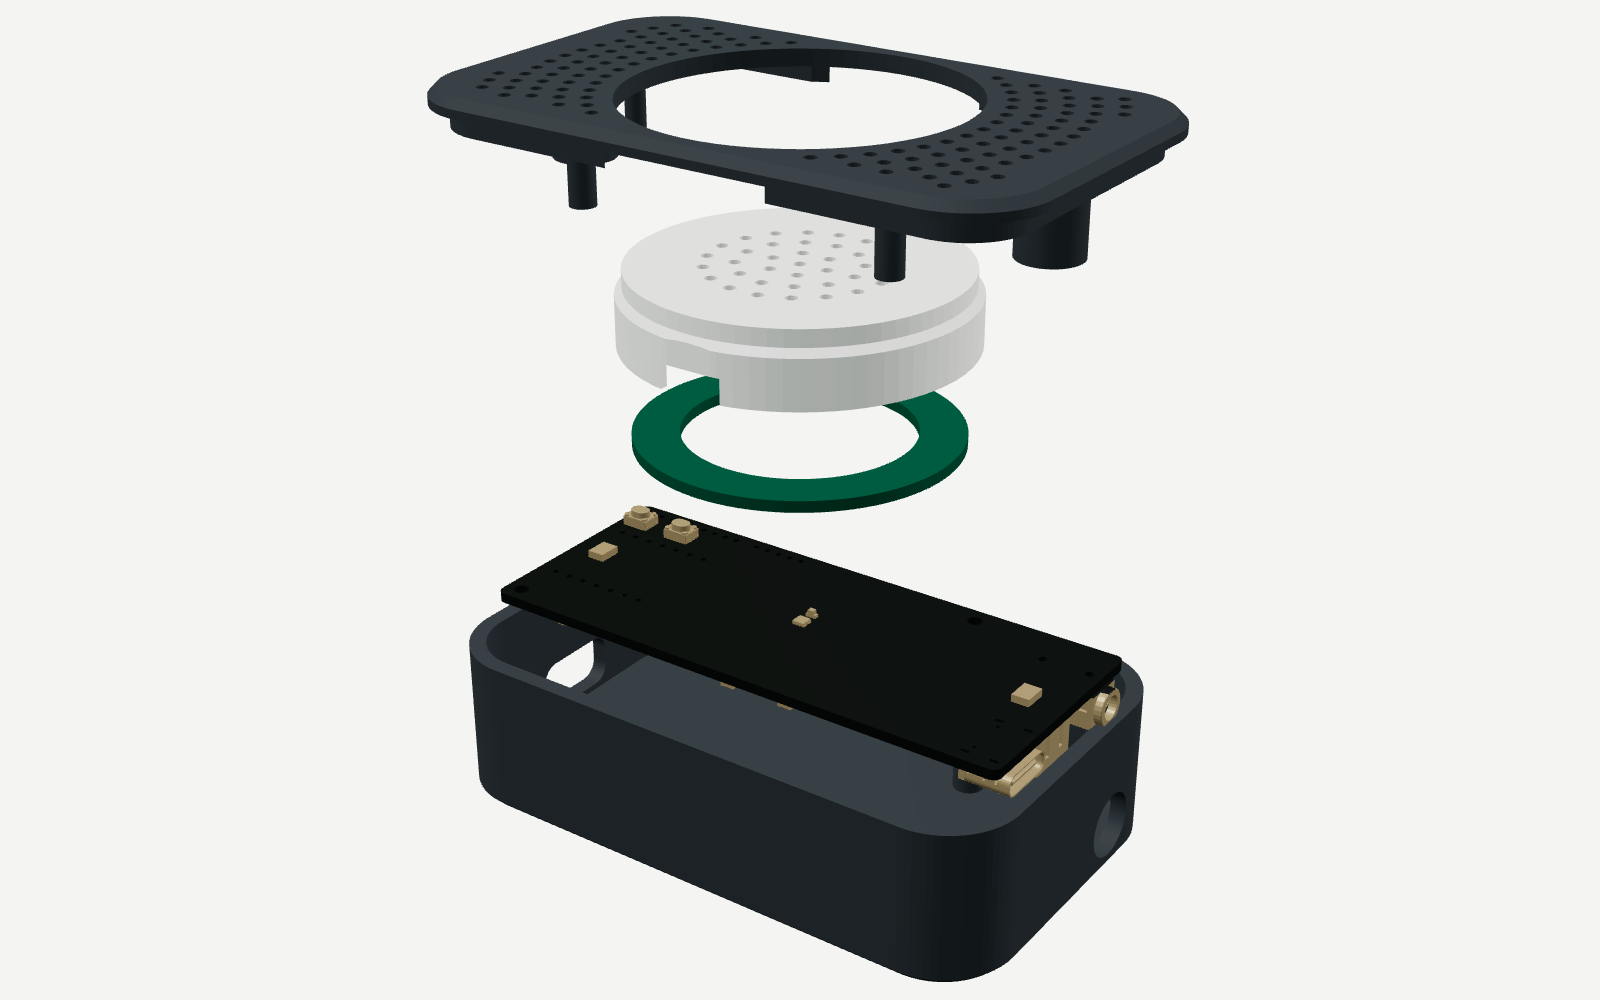
- Outer dimensions 91 × 59 × 57 mm; inner width of the board tray 54 mm.
- The ReSpeaker slides into rails on the two long sides and is held by two M2×5 screws.
- The lid snaps on; it opens with a fingernail at the notch on the XIAO end.
- The speaker sits face-down in the base; sound exits through the grille and the gap left by the feet. Its cable passes through a Ø5 hole into the board tray.
- Printing: PETG, 0.2 mm layers, 20% infill, no supports (every part is designed with its flat face on the bed). About 3.5 hours total.
STL files: jarvis_hoparlor_govdesi.stl, jarvis_taban.stl, jarvis_difuzor.stl, jarvis_kapak.stl, jarvis_ayaklar_4adet.stl — jarvis-kutu-v5-stl.zip. If you want a version for a 16-LED ring or without the speaker, write to me via Contact and I will generate it from the parametric file.
How long it took, what it cost
Time: soldering and the box took a weekend; the software and Turkish fine-tuning took evenings spread over three weeks. Today Jarvis's response time, from wake word to audio playing, is 2–3 seconds; local commands take 0.3 seconds.
Conclusion
Google Home Mini does not speak Turkish and never will. But with a weekend and four parts, it is possible to build an assistant that answers to whatever name you choose, speaks Turkish, lets you swap its brain whenever you like, and actually runs your home. And you get to decide whose server hears what you say.
For questions, the places where you get stuck, and photos of your own Jarvis, write to me via the Contact page.
Sources: formatBCE/Respeaker-Lite-ESPHome-integration (GitHub); Seeed ReSpeaker Lite wiki; Home Assistant "Assist" and "Voice" docs; ESPHome esp32_rmt_led_strip and i2s_audio docs.
Comments
Loading comments…